Figure Guide
BellaVista can be used to create poster, presentation, and paper-ready figures highlighting spatial discoveries in your data. Figures can also be reproduced between different sessions, different computers, and different users.
Reproducing sample figures (Xenium)
Below is a step-by-step guide to reproducing the following screenshots from a sample Xenium dataset.
Download sample data
Download sample data: Xenium mouse brain dataset (replicate 3) https://www.10xgenomics.com/datasets/fresh-frozen-mouse-brain-replicates-1-standard
To download the dataset, 10x Genomics may ask you to fill out a questionnaire.

Configuration files needed to reproduce the sample screenshots are available here on Dropbox.
Load BellaVista
Copy and save contents below into a new JSON file called
sample_figure_xenium_brain.jsonThis sample JSON can also be found in the Dropbox folder
Replace the path in
data_folderPython cannot parse JSON files containing file paths with single backslashes (\). To avoid errors, use either forward slashes (/) or double backslashes (\\) when representing file paths in the JSON strings.
{
  "system": "xenium",
  "data_folder": "/path/to/xenium_brain_rep3",
  "create_bellavista_inputs": true,

  "visualization_parameters": {
      "plot_image": true,
      "plot_transcripts": true,
      "plot_allgenes": false,
      "genes_visible_on_startup": true,
      "selected_genes": ["Igfbp5","Igf2","Gjc3","Gad2","Epha4","Dner","Dkk3",
                          "Col1a1","Cntnap4","Clmn","Ccn2","Cbln4","Cbln1",
                          "Car4","Calb2","Calb1","Cacna2d2","Cabp7","Bcl11b",
                          "2010300C02Rik"],
      "transcript_point_size": 0.75,
      "contrast_limits": [0, 5000],
      "rotate_angle": 180
  },

  "input_files": {
      "transcript_filename": "transcripts.parquet",
      "images": "morphology_mip.ome.tif"
  }

}
In the terminal, run BellaVista with the Xenium sample JSON.
The JSON file argument should contain the file path to the JSON file.
$ bellavista sample_figure_xenium_brain.json
Note
It will take a few minutes to create the required data files. The terminal will print updates & have progress bars for time consuming steps.
Once loaded, your napari window should look similar to this. The gene colors displayed will be different, but we'll reassign those later!
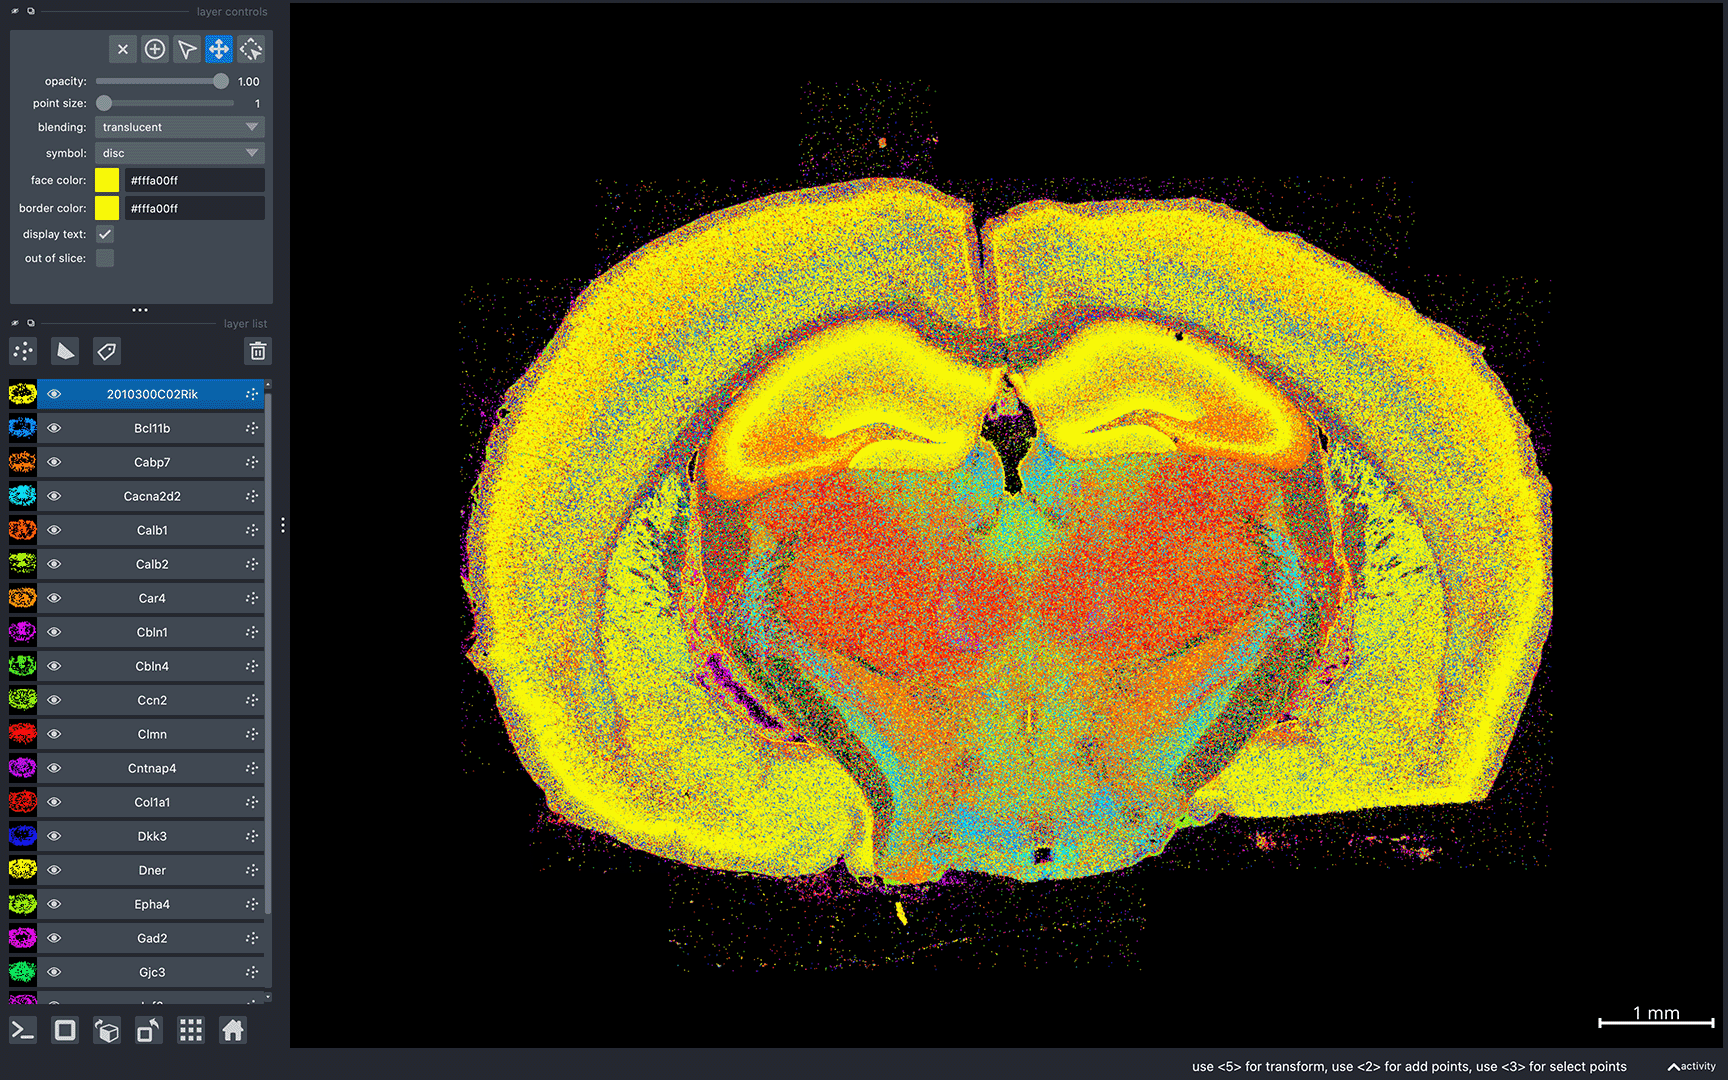
Now that the data has loaded, we can start configuring it to reproduce the example figures. These next steps will all be done in the napari console.
Note
When taking screenshots on different computers, the content visible may be different due to different display sizes and screen resolutions.
Here is a comparison of screenshots taken on different display resolutions:
4K display
Full HD display

Tip
If you're using a lower-resolution display, you can enhance the quality of saved images by specifying a higher resolution when saving screenshots. In the following tutorial, I will specify a 4K resolution in the screenshot_resolution variable in step 1.
This parameter can also be used to save screenshots in various sizes, such as square screenshots.
Full HD display with a save resolution of 4K
Using the napari console
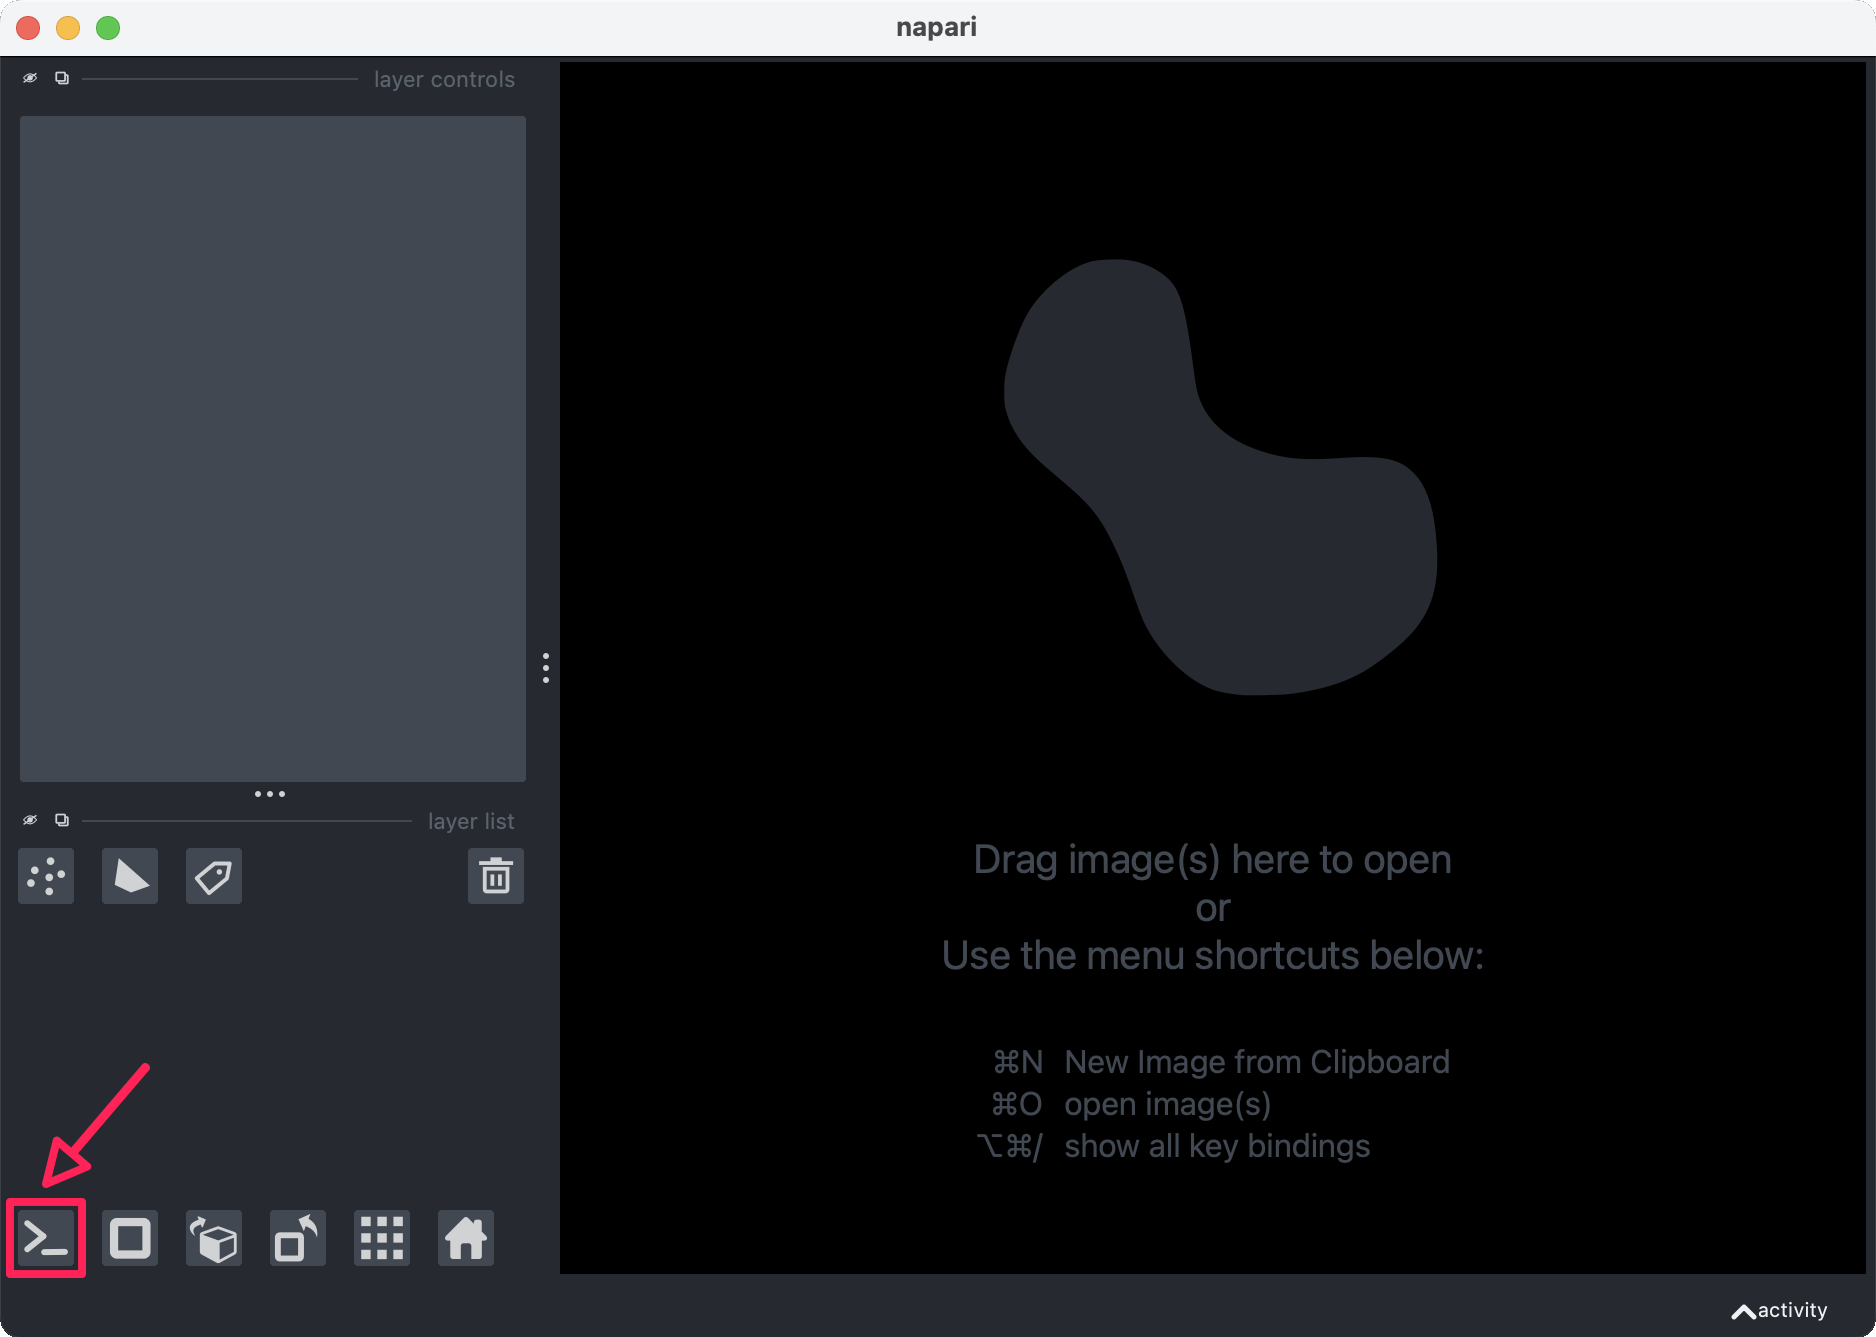
To take screenshots and save current layer configurations, you can use the napari console.
The napari console can be found in the bottom left of the gui:
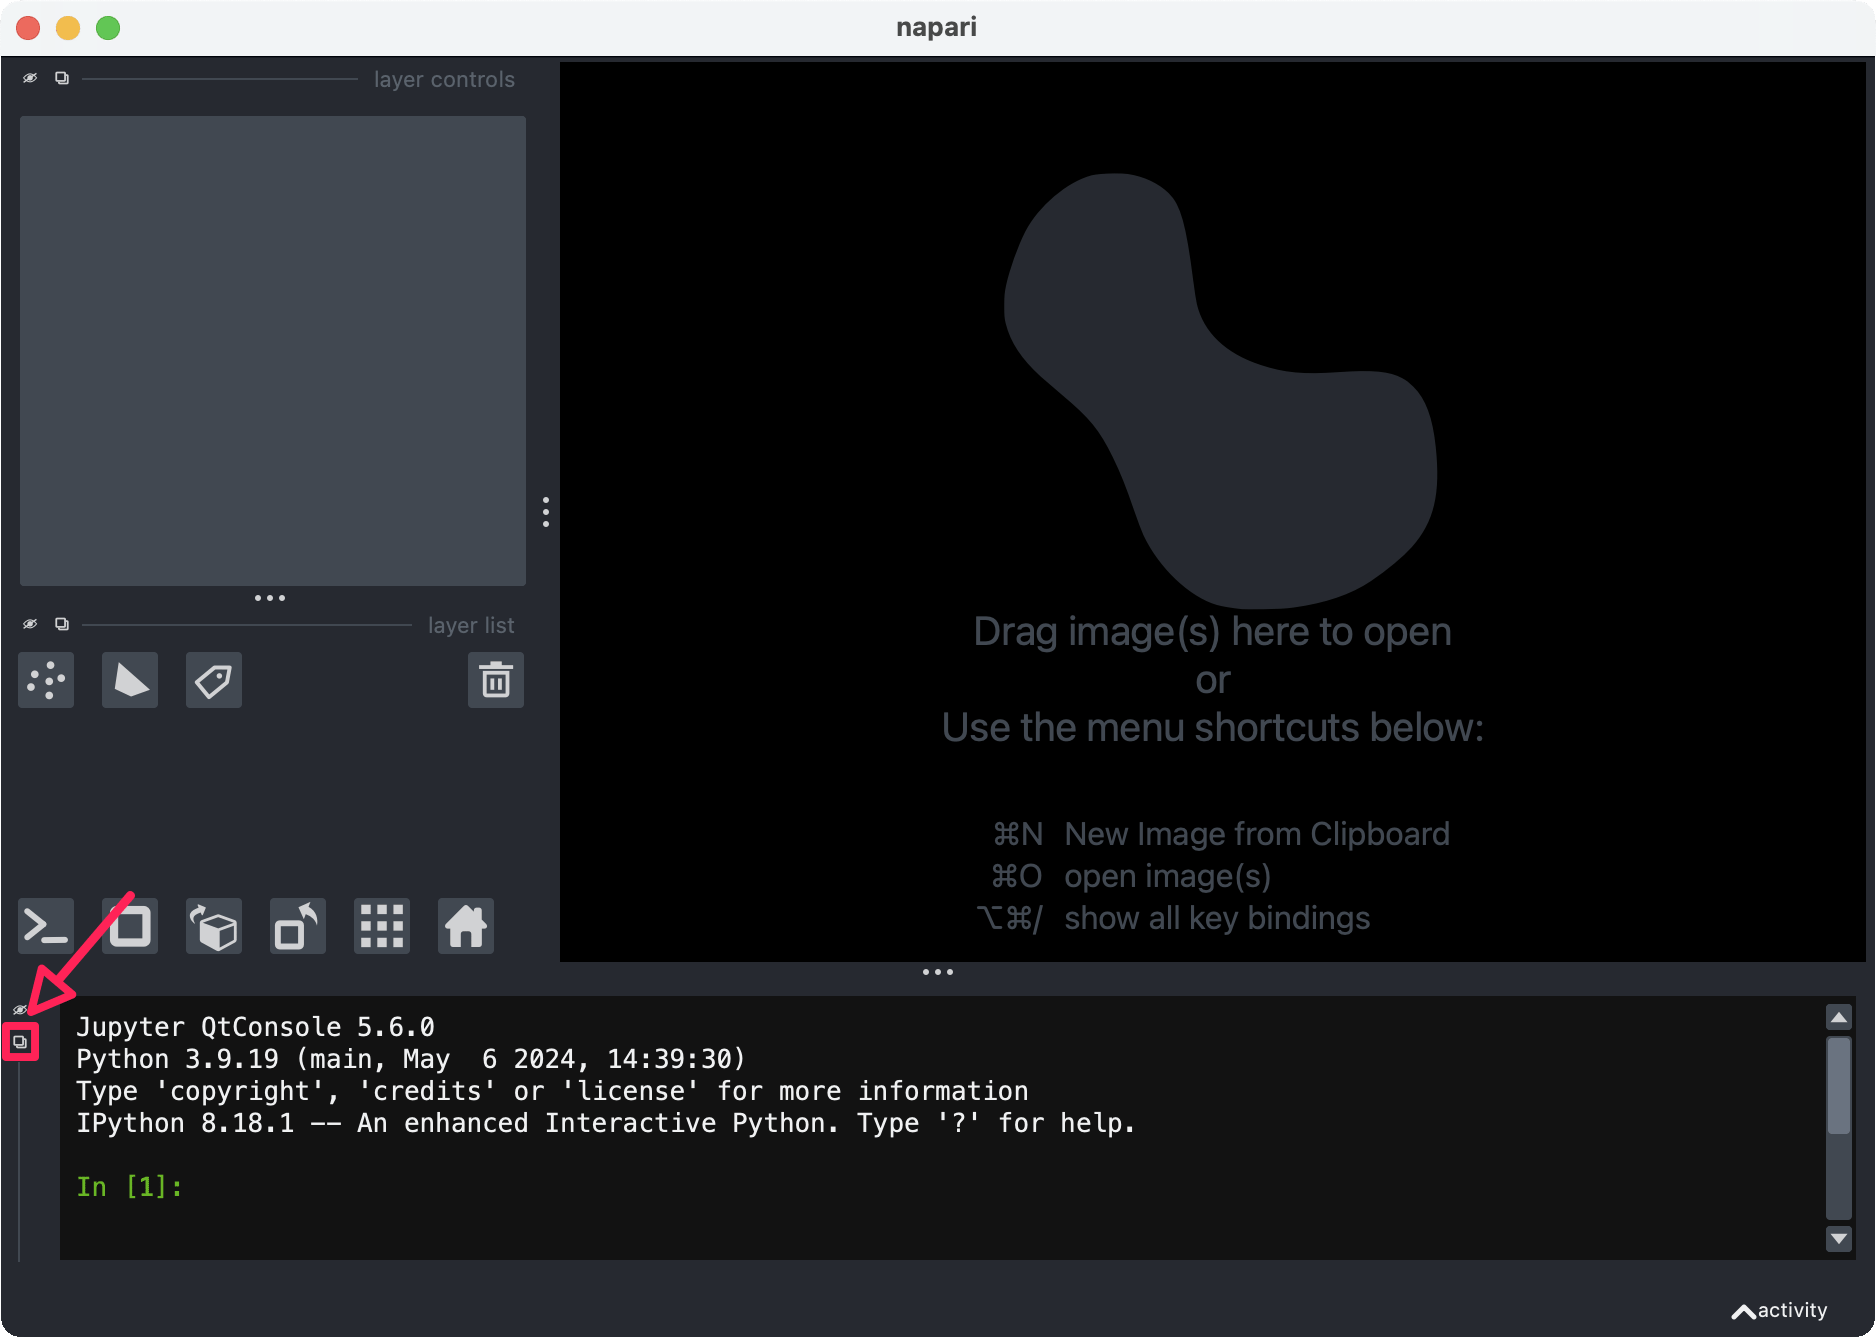
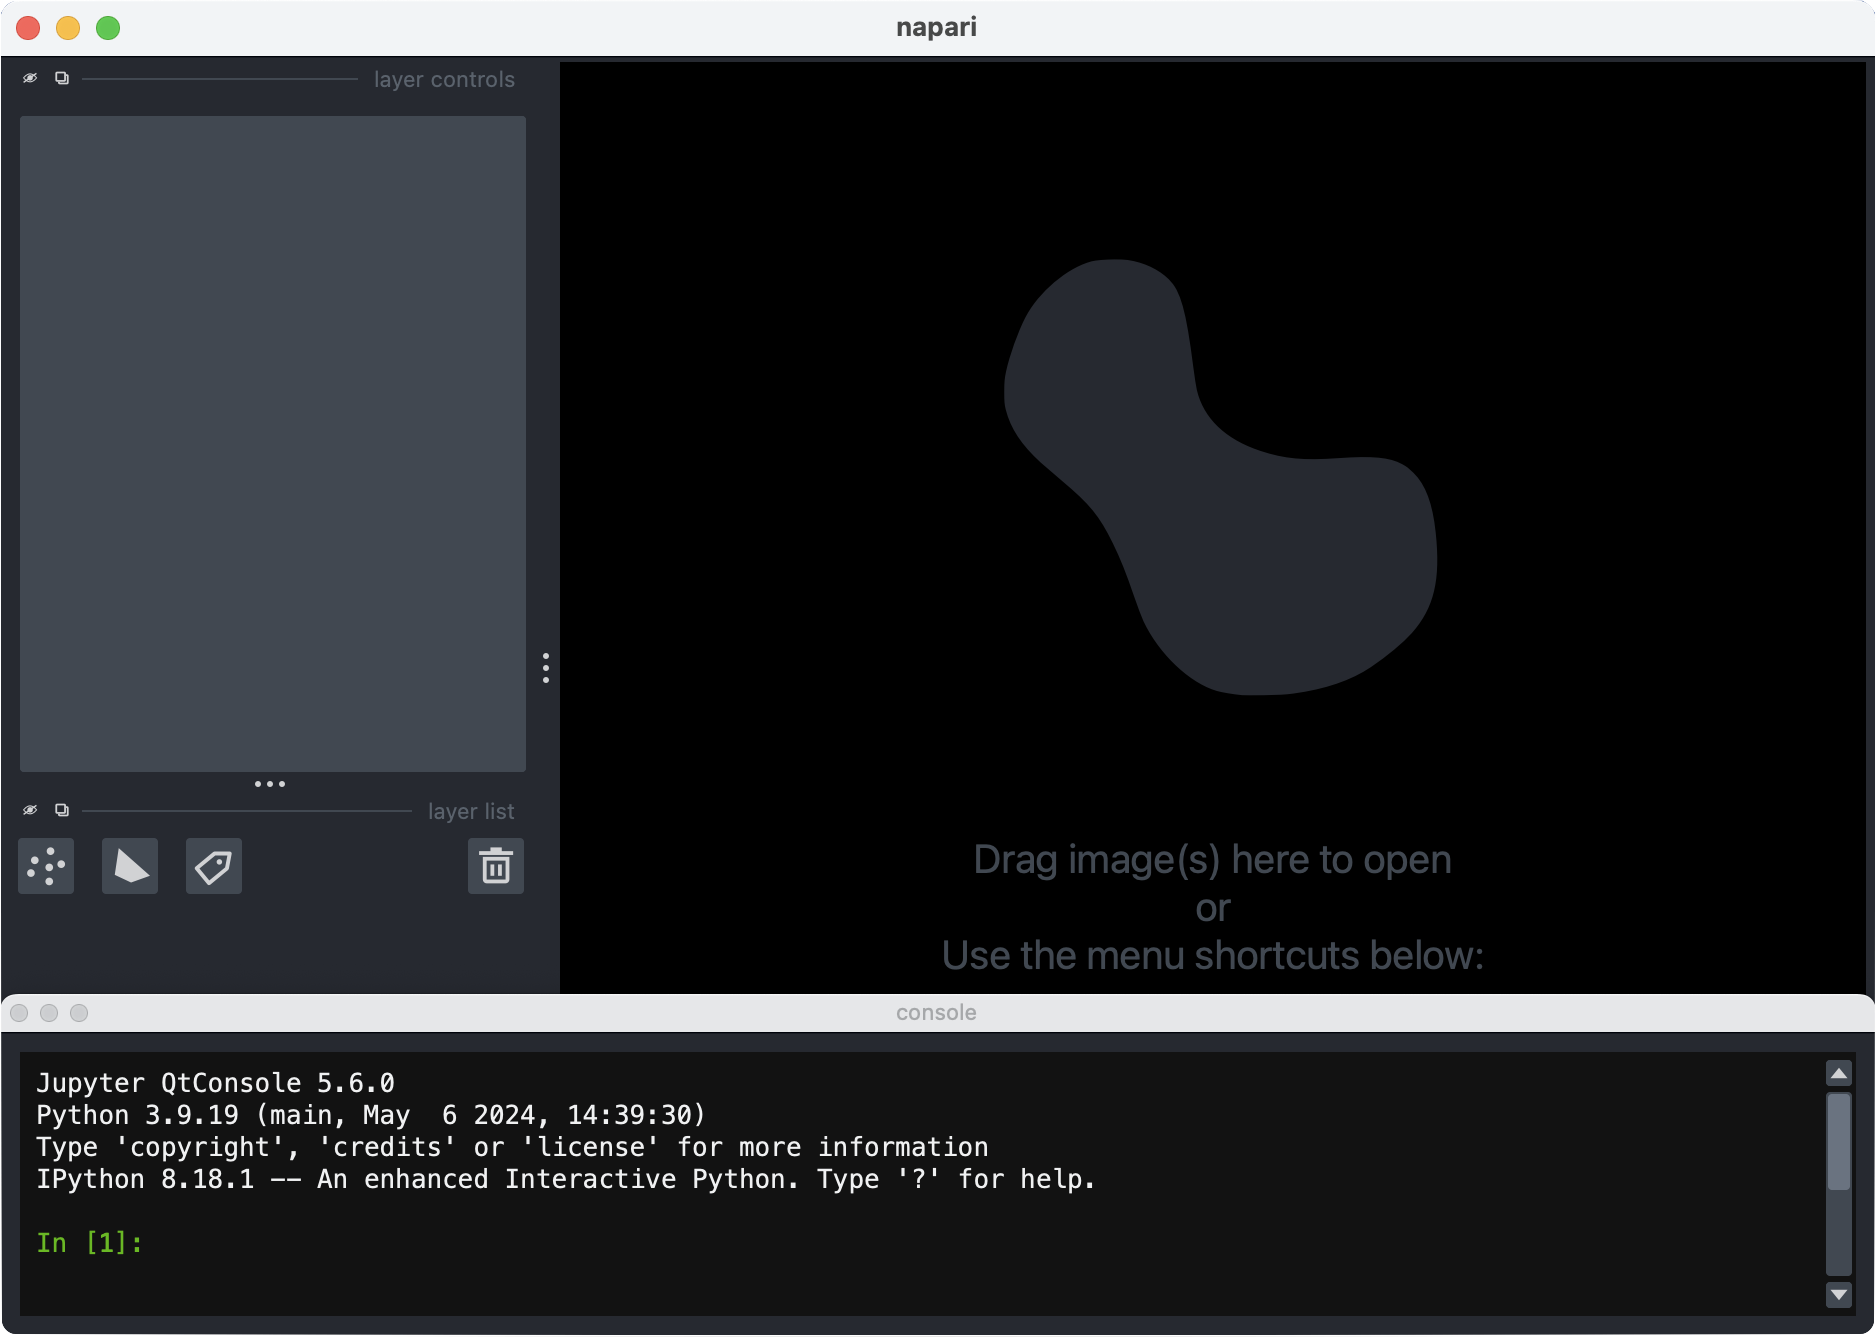
Note: To maximise content visible in the canvas, open the console in a separate window:

Change settings to match example configuration
1. Set saved image resolution
import os
import pickle

# to save images at the default resolution of your display, set to None
save_resolution = (2160, 3840) # 4K resolution
2. Change folder paths
#path to folder containing configuration files
pkl_dir = '/path/to/BellaVista_Xenium_sample_figure'

#path to save folder
screenshot_dir = '/path/to/BellaVista_Xenium_sample_figure/user_screenshots'

if not os.path.exists(screenshot_dir):
    os.makedirs(screenshot_dir)
3. Assign gene colors
with open(os.path.join(pkl_dir, 'xenium_brain_gene_colors_dict.pkl'), 'rb') as f:
    gene_colors_dict = pickle.load(f)
for gene in gene_colors_dict.keys():
    viewer.layers[gene].face_color = gene_colors_dict[gene]
4. Change colormap for DAPI image
image_layers = [layer for layer in viewer.layers if isinstance(layer, napari.layers.Image)]
for layer in image_layers:
    layer.colormap = 'dodgerblue'
    layer.gamma = 1.6
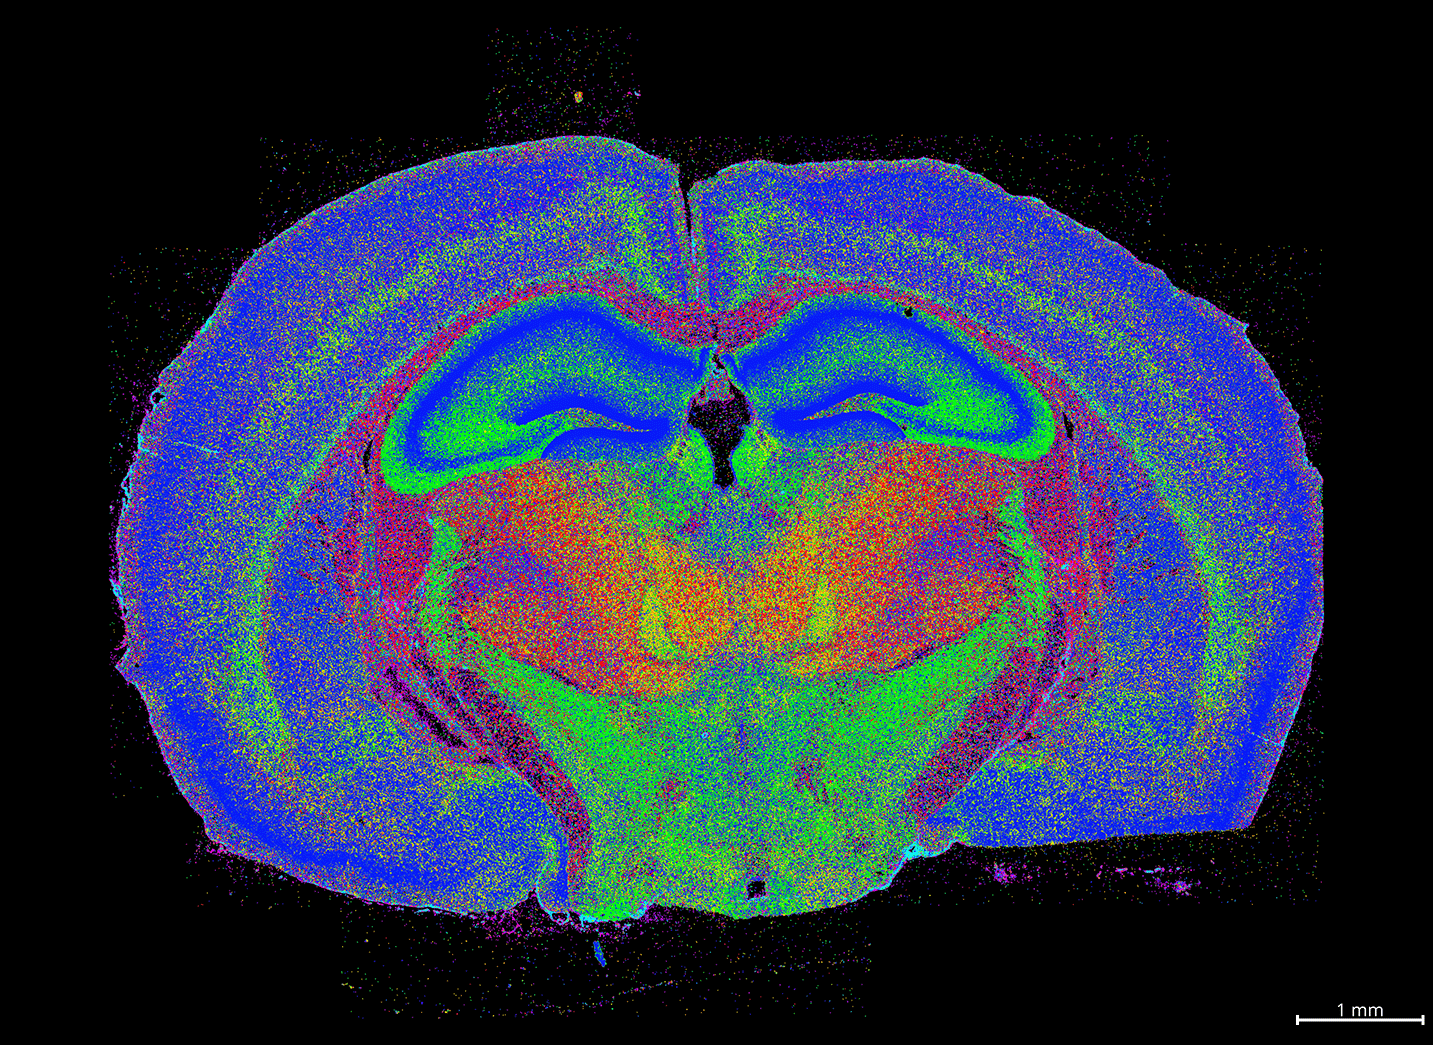
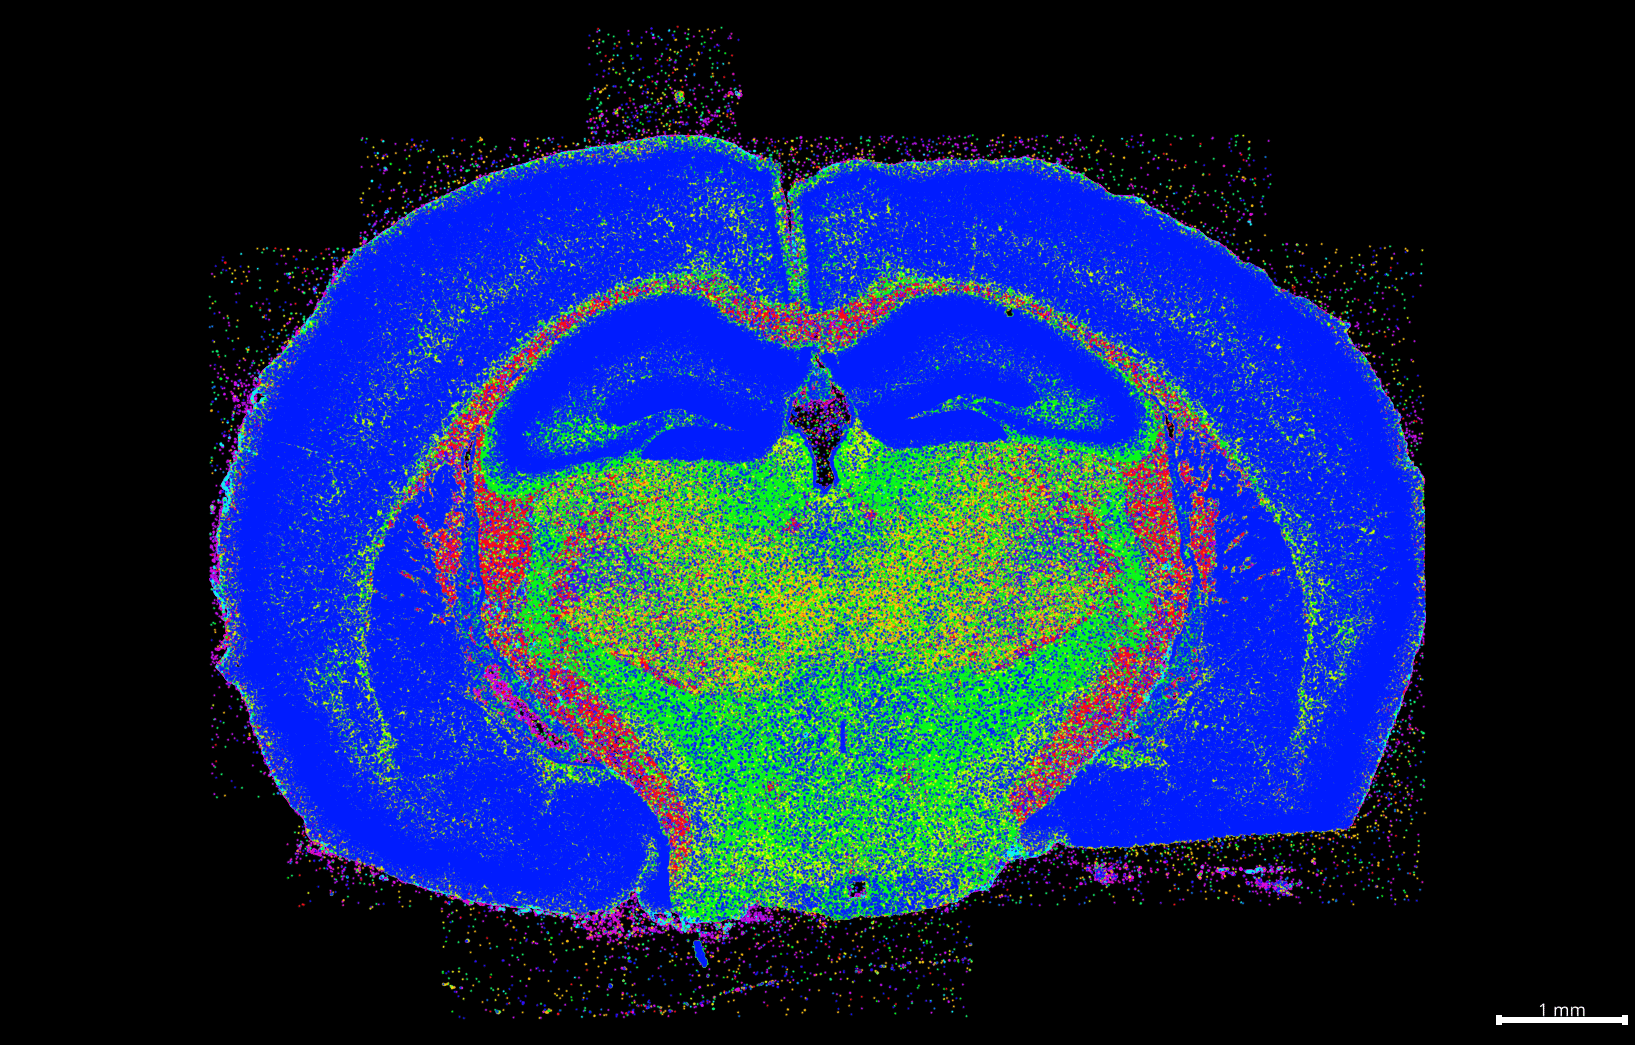
5. Take zoomed out screenshot
with open(os.path.join(pkl_dir, 'xenium_brain_position_0.pkl'), 'rb') as f:
    position_0 = pickle.load(f)
viewer.camera.center, viewer.camera.zoom = position_0['center'], position_0['zoom']
viewer.screenshot(os.path.join(screenshot_dir, 'xenium_brain_position_0.png'),
                    size = save_resolution)
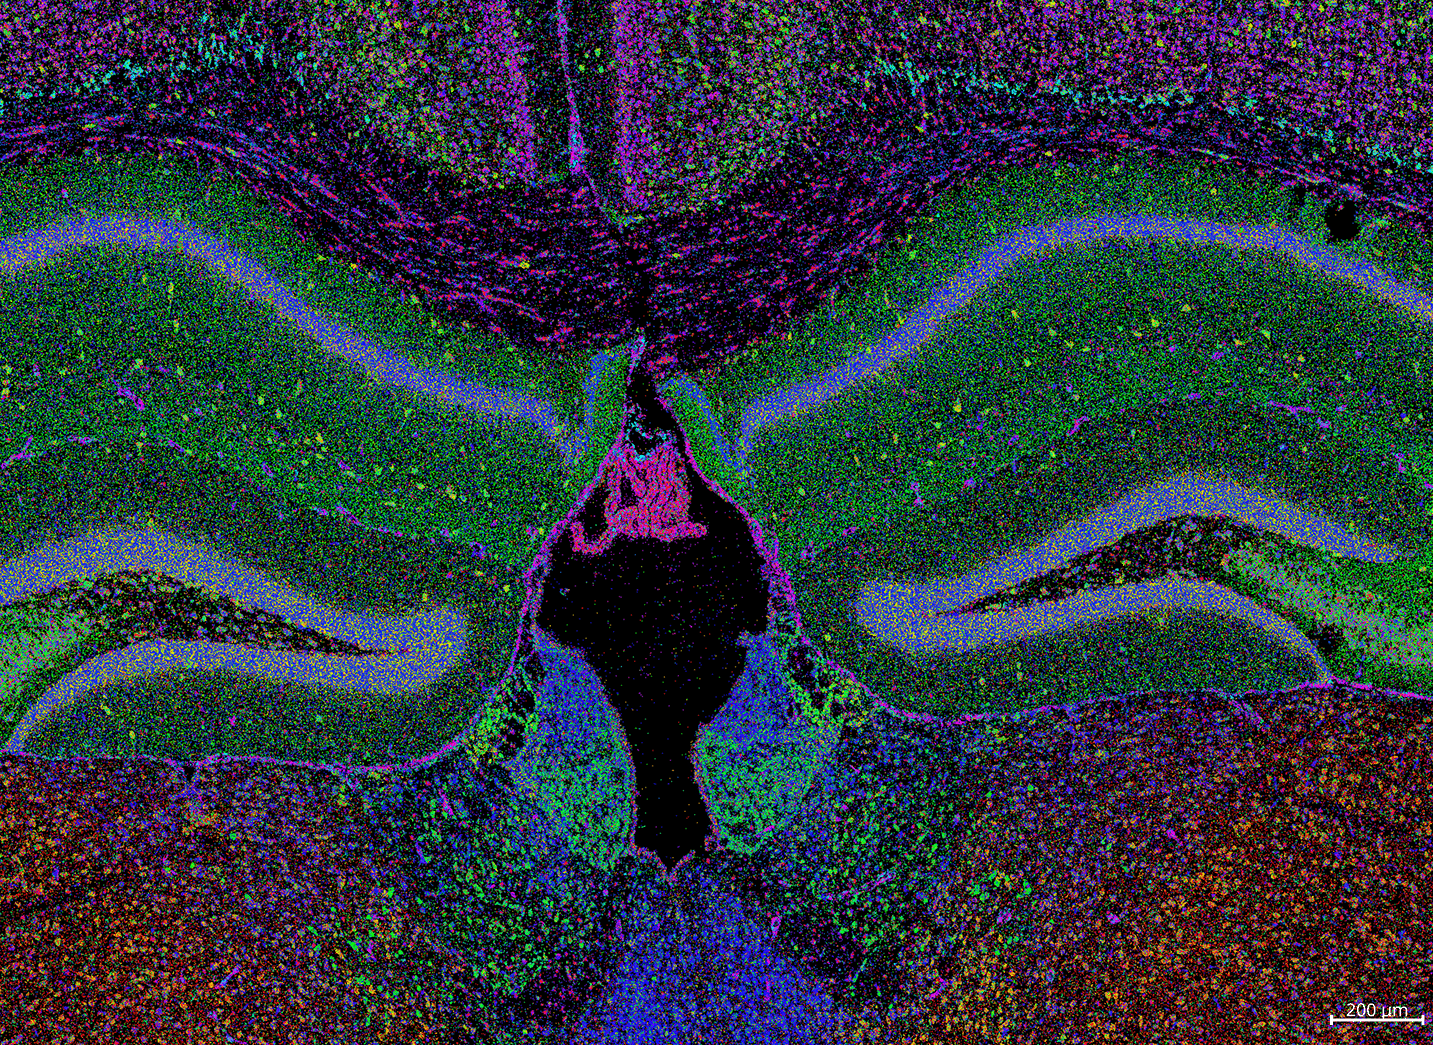
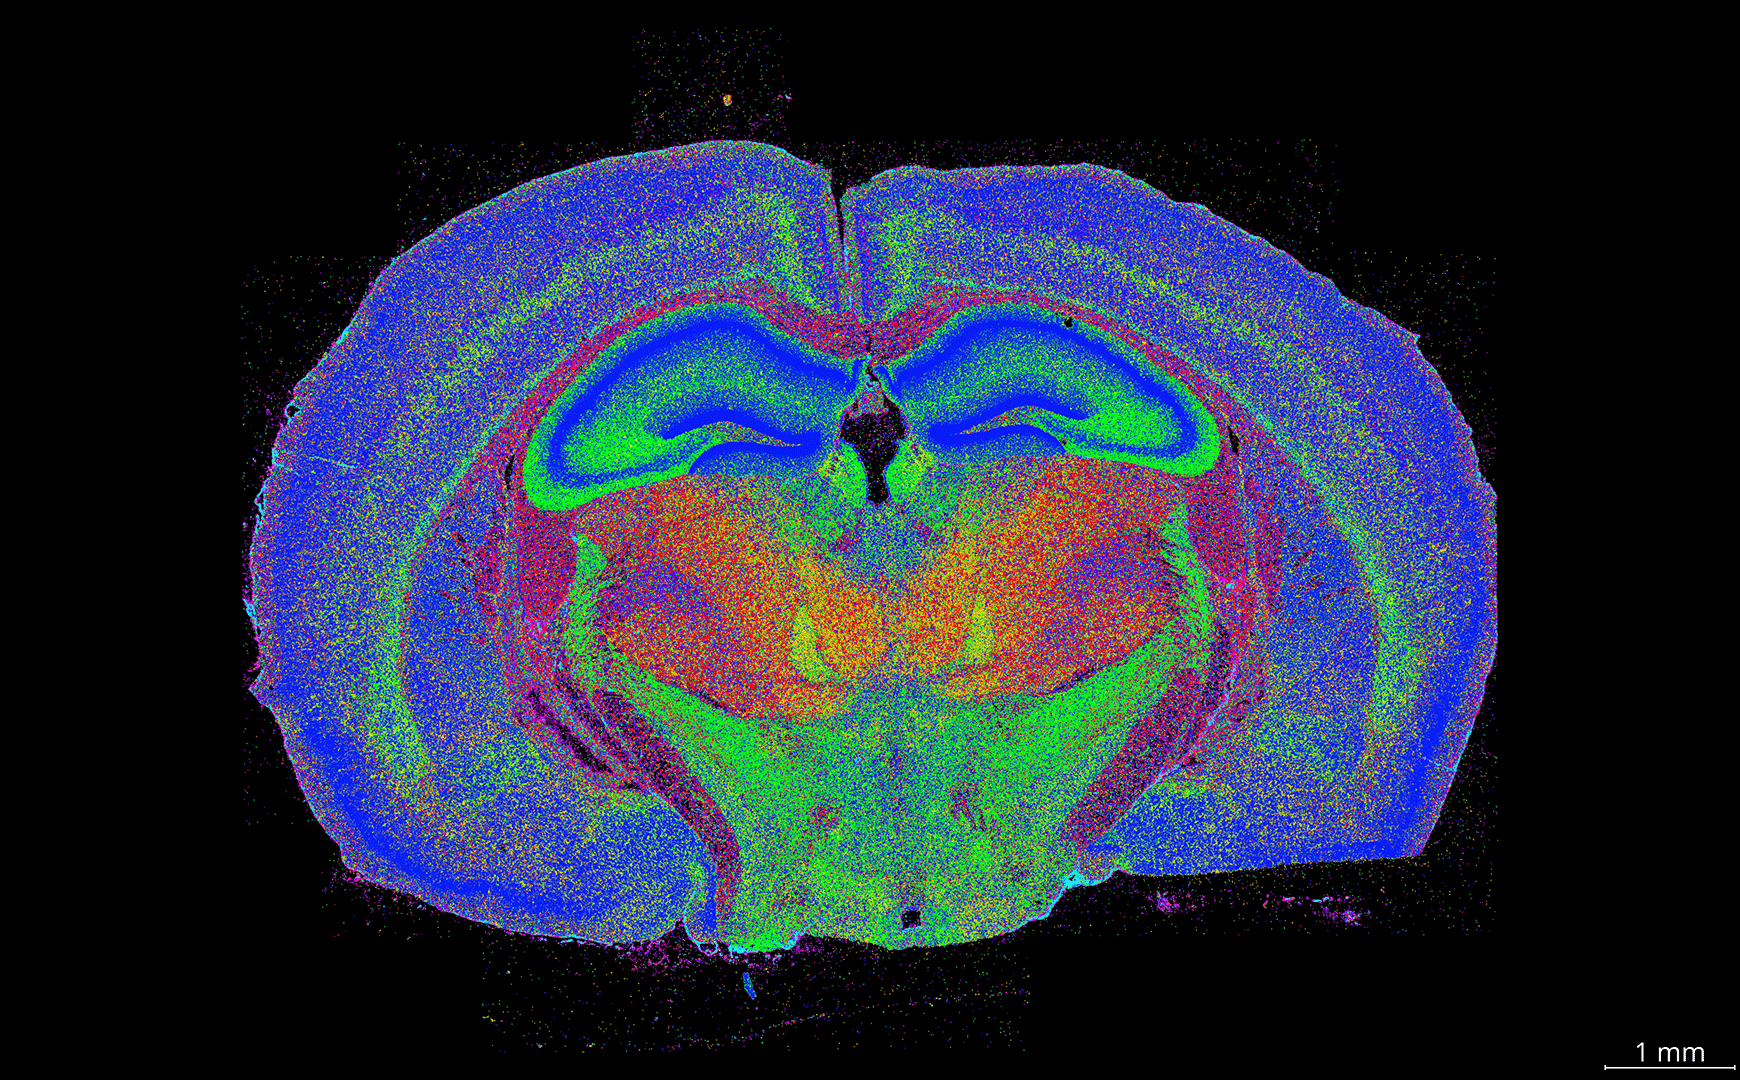
6. Zoom in
with open(os.path.join(pkl_dir, 'xenium_brain_position_1.pkl'), 'rb') as f:
    position_1 = pickle.load(f)
viewer.camera.center, viewer.camera.zoom = position_1['center'], position_1['zoom']
viewer.screenshot(os.path.join(screenshot_dir, 'xenium_brain_position_1.png'),
                    size = save_resolution)
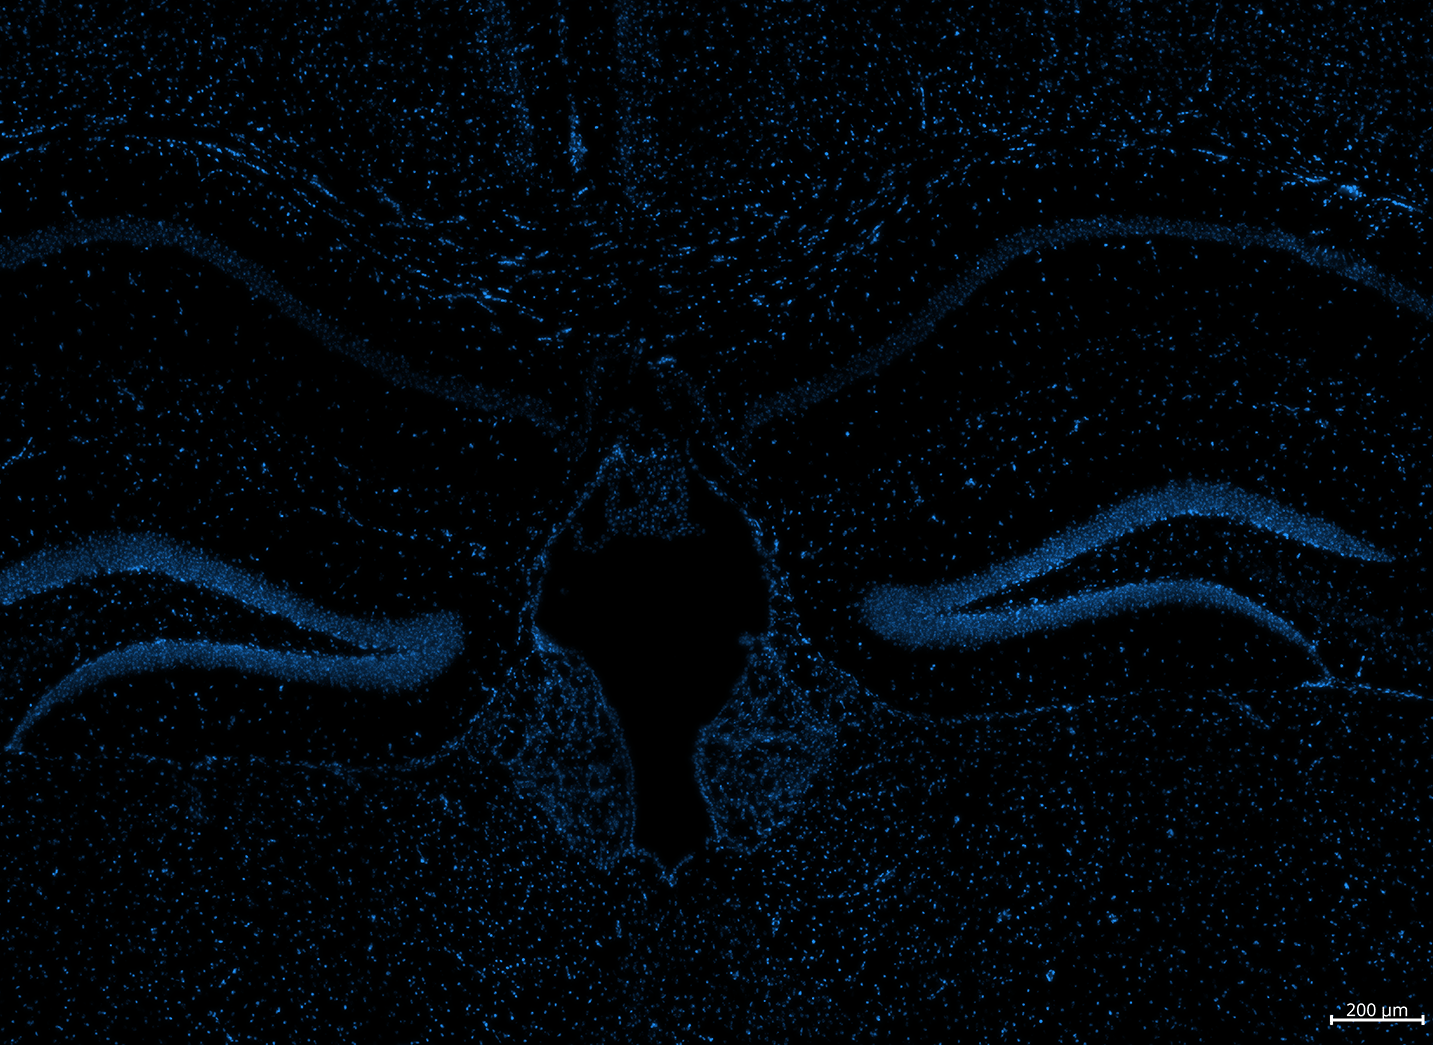
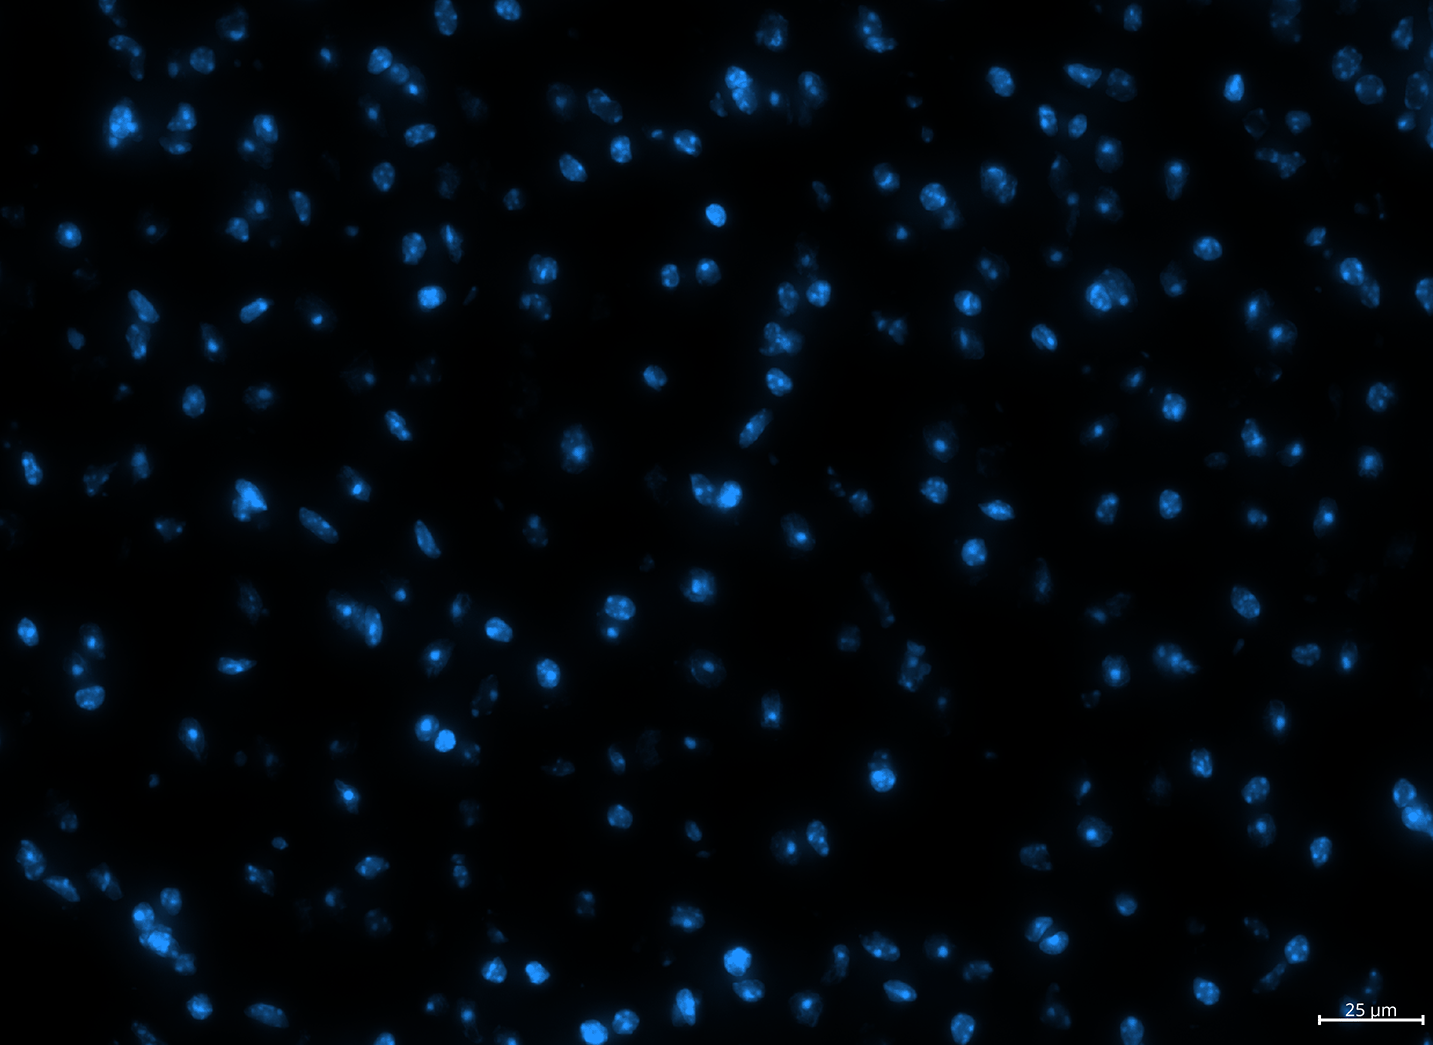
7. Toggle off visibility of gene layers, leaving only DAPI visible
for layer in viewer.layers:
    if isinstance(layer, napari.layers.Image):
        layer.visible=True
    else:
        layer.visible=False
viewer.screenshot(os.path.join(screenshot_dir, 'xenium_brain_position_1_DAPI.png'),
                    size = save_resolution)
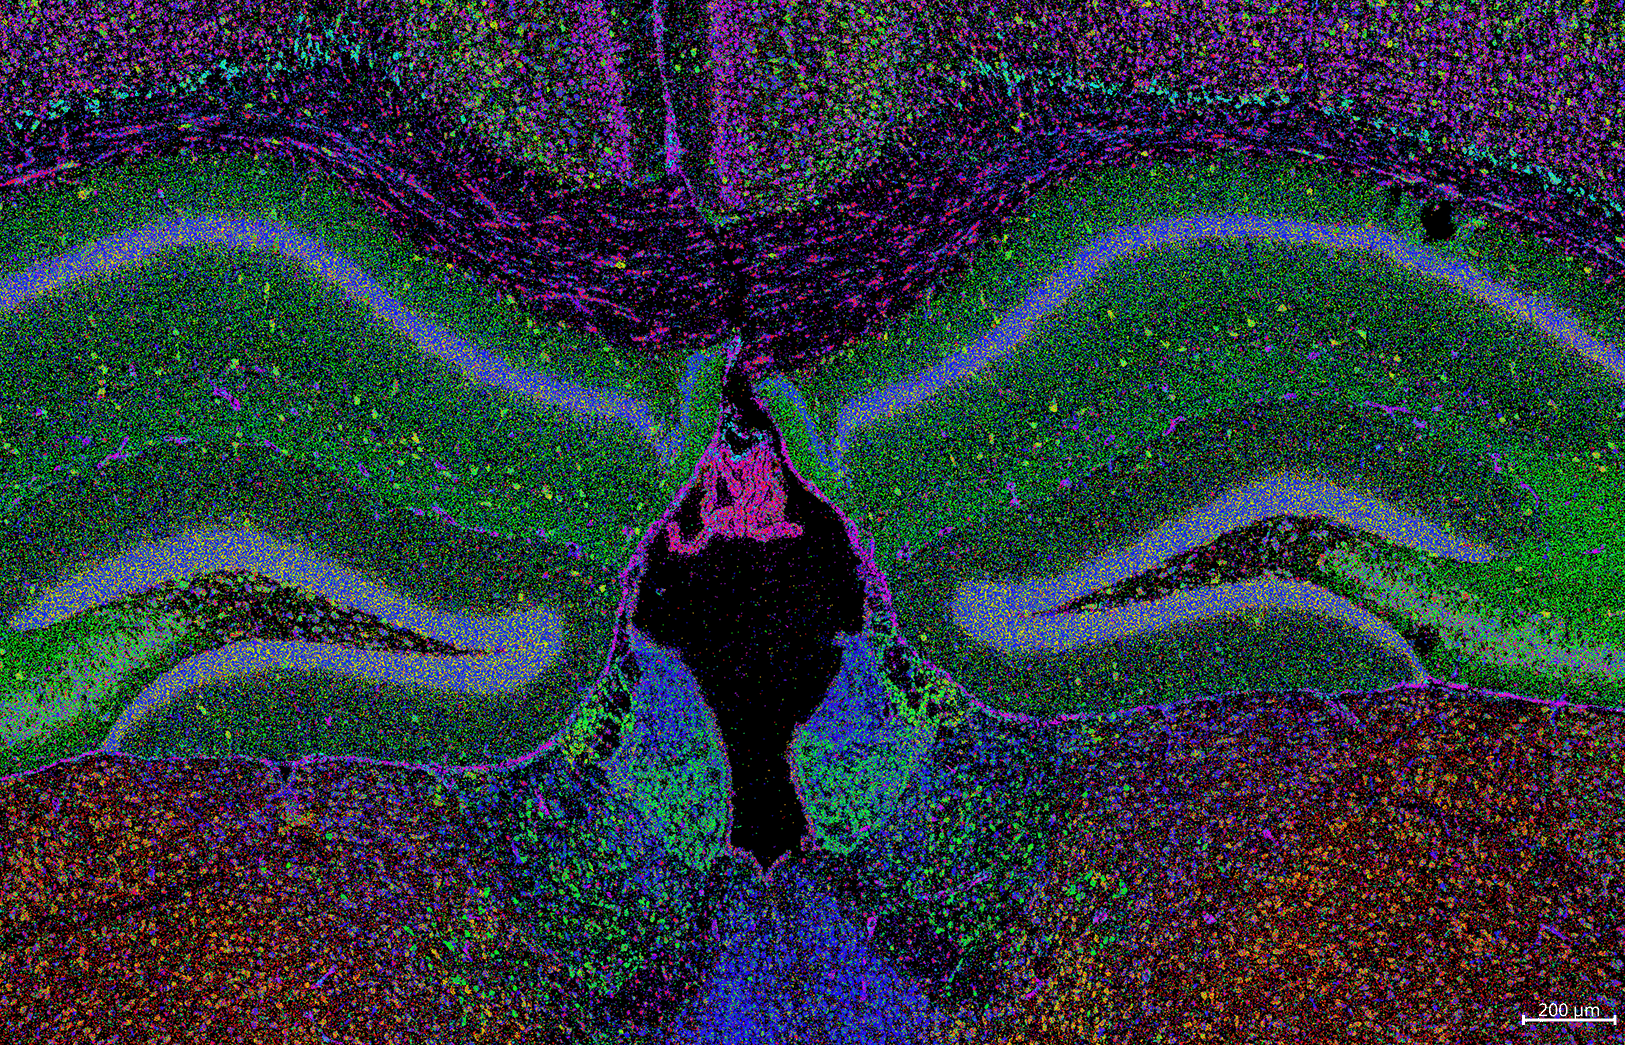
8. Zoom in further
with open(os.path.join(pkl_dir, 'xenium_brain_position_2.pkl'), 'rb') as f:
    position_2 = pickle.load(f)
viewer.camera.center, viewer.camera.zoom = position_2['center'], position_2['zoom']
viewer.screenshot(os.path.join(screenshot_dir, 'xenium_brain_position_2_DAPI.png'),
                    size = save_resolution)
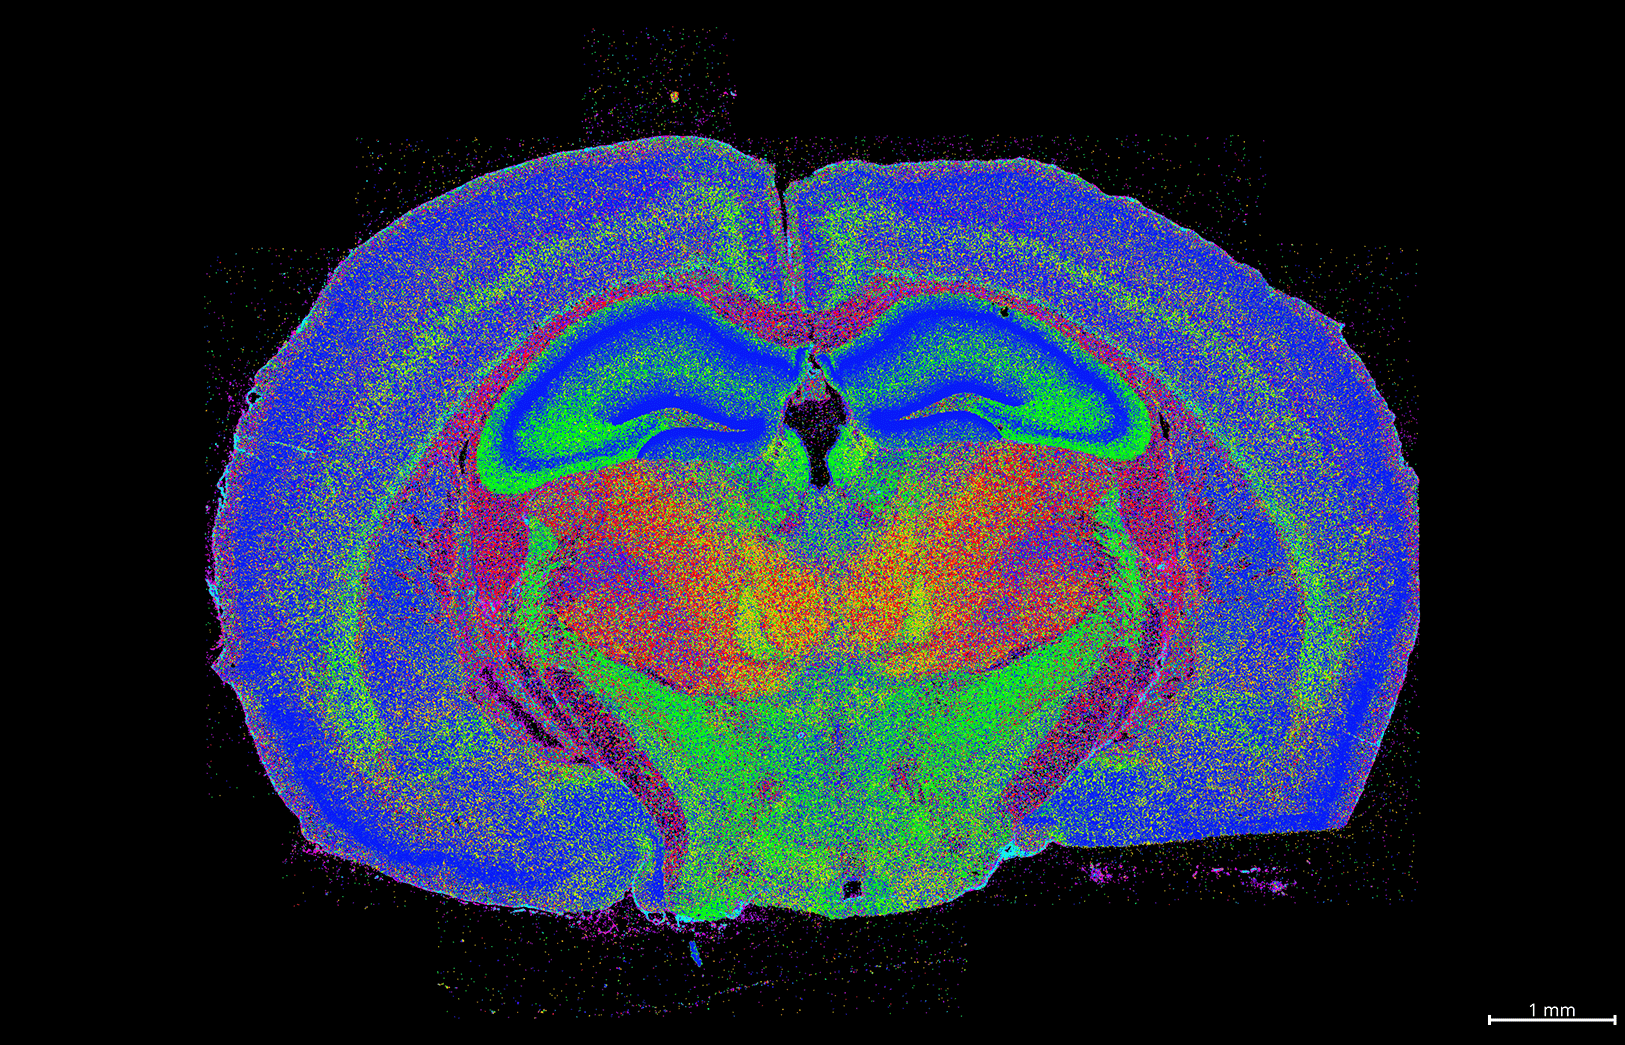
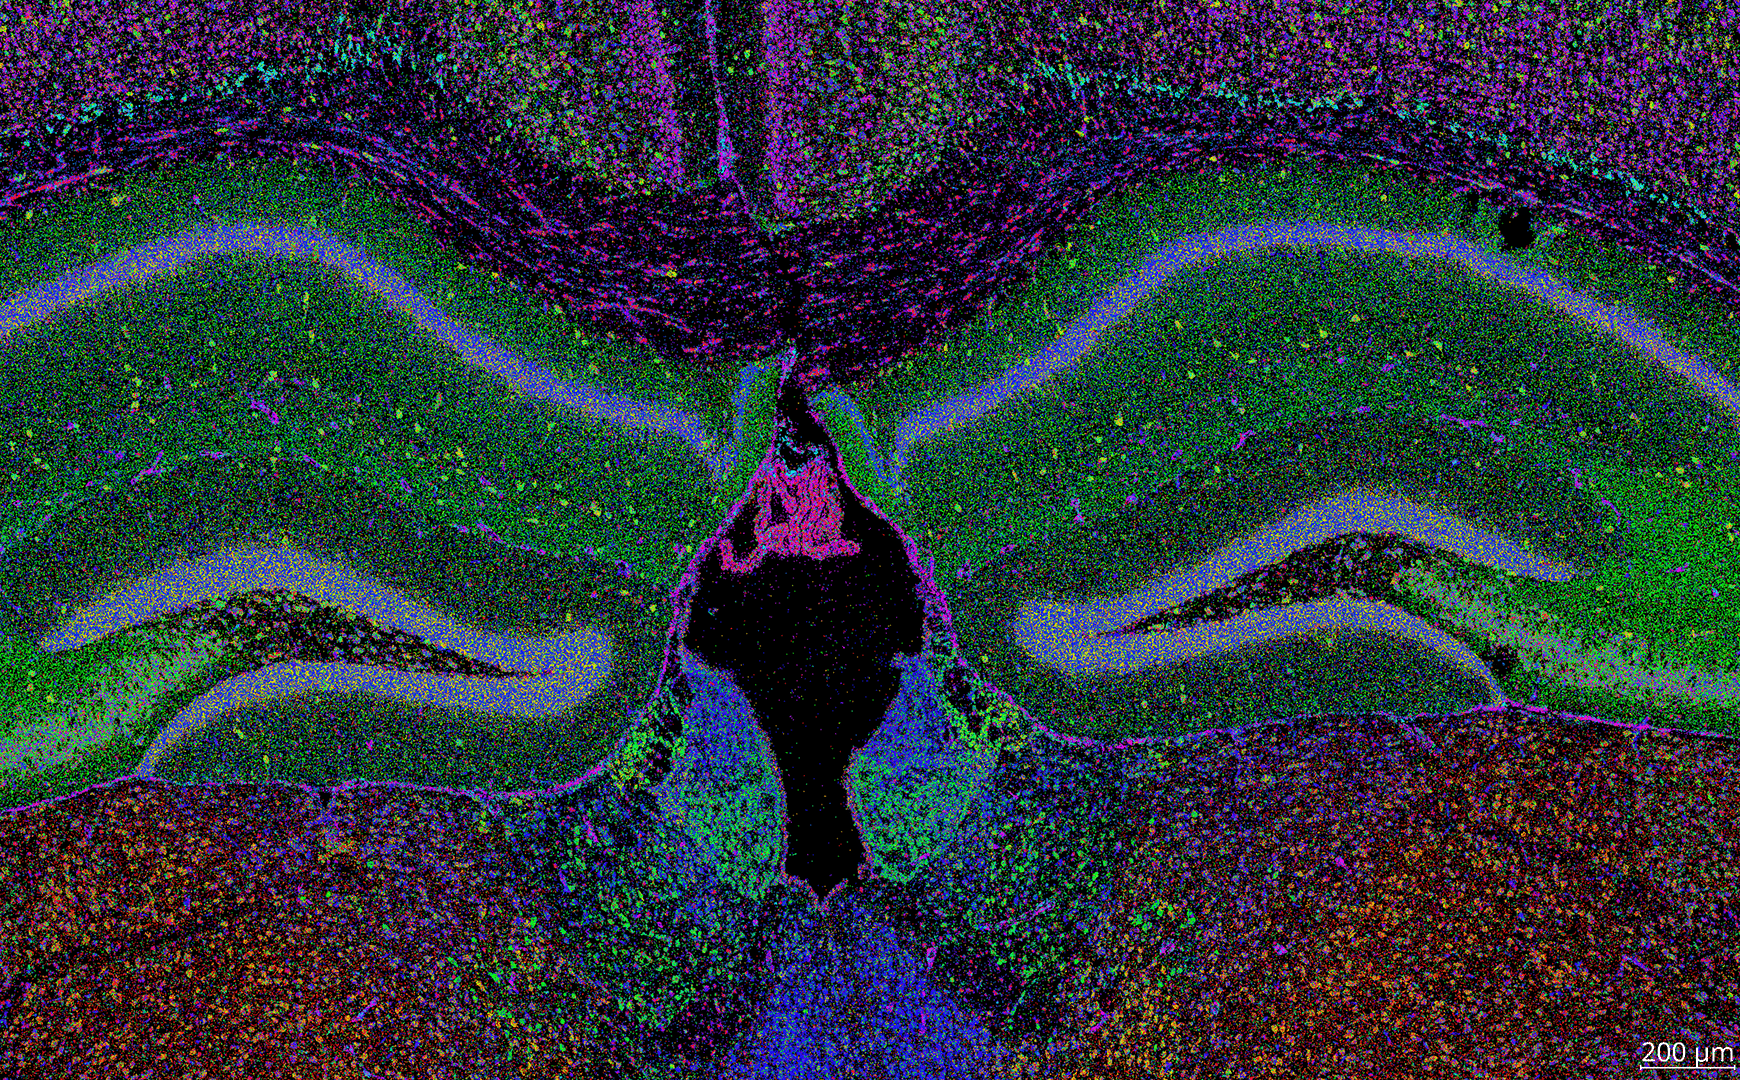
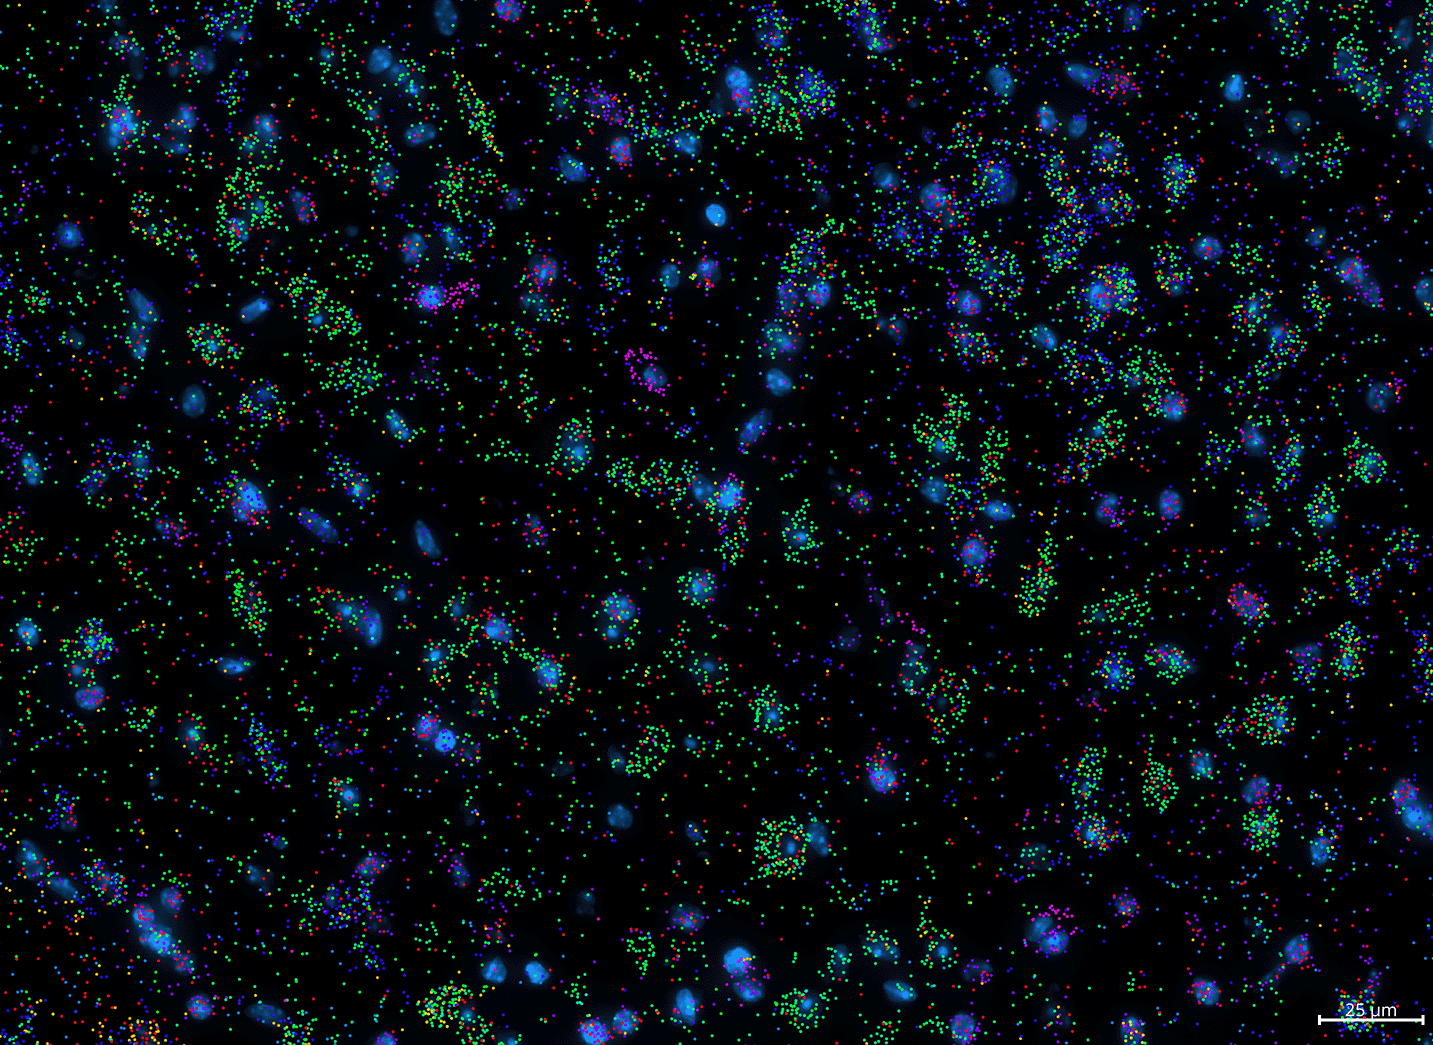
9. Toggle visibility of all layers on
for layer in viewer.layers:
    layer.visible=True
viewer.screenshot(os.path.join(screenshot_dir, 'xenium_brain_position_2.png'),
                    size = save_resolution)
Creating your own figures!
Useful commands
Use these commands in the napari console. See Using the napari console section below. More commands and napari tips can be found in the FAQ.
Screenshot current canvas:
# save screenshot to folder
viewer.screenshot("/path/to/folder/napari_canvas.png")
Set saved screenshot resolution:
# set save resolution to 4K
save_resolution = (2160, 3840)

# save screenshot with 4K resolution to folder
viewer.screenshot("/path/to/folder/napari_canvas.png", size = save_resolution)
Save current camera position & zoom:
import pickle

# save current camera state
position_1 = {'center': viewer.camera.center, 'zoom': viewer.camera.zoom}
with open('/path/to/folder/position_1.pkl', 'wb') as f:
    pickle.dump(position_1, f)
Return to saved position:
import pickle

# load previous camera state
with open('/path/to/folder/position_1.pkl', 'rb') as f:
    position_1 = pickle.load(f)

# return to camera state from previous screenshot
viewer.camera.center, viewer.camera.zoom = position_1['center'], position_1['zoom']
Save transcript colors for each gene:
import pickle

# store current transcript colors in a dictionary
gene_colors_dict = {}
gene_layers = [layer for layer in viewer.layers if isinstance(layer, napari.layers.Points)]
for gene_layer in gene_layers:
    gene_colors_dict[gene_layer.name] = gene_layer.face_color[0]

# save dictionary
with open('/path/to/folder/gene_colors_dict.pkl', 'wb') as f:
    pickle.dump(gene_colors_dict, f)
Load saved transcript colors:
import pickle

# load saved transcript colors
with open('/path/to/folder/gene_colors_dict.pkl', 'rb') as f:
    gene_colors_dict = pickle.load(f)

# assign gene transcript point colors
for gene in gene_colors_dict.keys():
    viewer.layers[gene].face_color = gene_colors_dict[gene]
Export point (gene) layers as svg file:
# save single layer as svg file
viewer.layers["geneA"].save("path/to/geneA.svg")

# save range of layers to single svg file
viewer.layers[5:10].save("path/to/5genes.svg")
Important
To export point layers to a SVG file, the point size must be an integer. If your point size is a float, you can change the point size using the commands in the example below.
Changing point sizes:
# check current point size for "geneA"
print(viewer.layers["geneA"].size)

# change point size for "geneA" to 1
viewer.layers["geneA"].size = 1
Using the napari console
To take screenshots and save current layer configurations, you can use the napari console.
The napari console can be found in the bottom left of the gui:
Note: To maximise content visible in the canvas, open the console in a separate window: